Monday, 28 April 2014

Homemade Fish Fingers

This is a great one for the whole family and if you have keen little chefs, they can even help out (Millie unfortunately is still too young and would end up eating a lot of raw fish and egg - ugh!!)

It's so simple, you will need:
  • White fish (filleted and skinned) - I used Plaice as it was on offer but cod or haddock would obviously work too.
  • One beaten egg (depending on the amount of fish you have, start with one, you can always do more)
  • Plain flour
  • Breadcrumbs (TIP: If no one in your house likes the loaf crusts, toast them lightly and blitz them in a food processor into breadcrumbs - you can then freeze them in a food bag ready for when you want them.)
  • Oil for frying (I use olive because I like it but vegetable or sunflower would also be fine)
Put the egg, flour and breadcrumbs in three separate bowls. Cut the fish into finger sizes (again, it's much better if your fish is already skinned, I know from experience!)


Now for the messy bit (older munchkins might like to help out).

First flour the fish fingers, then dip in the beaten egg and finally cover in breadcrumbs. I would recommend doing all the flouring, then all the egging, then the breadcrumbs, you'll get (slightly) less messy - if you have helpers, give them a bowl each.

Your fingers should now look like this:
Grown up bit (strictly no kiddies)! Heat half an inch of oil in a wok or deep frying pan and shallow fry the fingers in batches for about 5 minutes or until golden and you are happy the fish is cooked.
 
Pop them on some kitchen towel to soak up the oil and they are ready to serve.
You can batch cook these and freeze them into portions. If freezing, to reheat defrost thoroughly and then bake in the oven until piping hot.
 
These are a great finger food for babies/toddlers and for older children and adults, I suggest popping in between two slices of bread with some tartar sauce - delish! 
 
Just to prove that a 9 month old will enjoy them...


Emily x
 

Friday, 25 April 2014

Hatty's Home Tour: Guest Room and Studio

My second bedroom also doubles up as my studio, so as well as being a comfortable place for guests to sleep it mostly needs to have plenty of storage space and be practical for me to sew, create, paint and work. 

My dad made this ace corner desk that makes the most of the space available for a desk, it means I can have my sewing machine set up and laptop and printer set up at the same time. it also creates more storage space under the desk which is covered up with the curtains. 

The ikea kitchen wall cabinets and tall boy also creates more storage and the shelving was a really ugly cheap cabinet with the glass missing that I picked up for pennies, I think the lick of paint makes a prefect display for my camera collection. 

The day bed was my old bed but I would prefer a double bed in here so couples can stay a little more comfortably. For space reasons a standard double would take up too much of the room, however a fold down wall bed would be amazing, I keep checking eBay for one in my area, but I might start making plans for a way to make one myself (with help from dad, of course).

I got the curtains from a retro shop in Leeds and took them up to fit the window and with the left over fabric I'm going to cover an office chair to match.

I also made the duvet cover out of some retro double flat sheets I picked up at a car boot fair, I love the mix matched 1970s prints, and the orange and mustard yellow colour story is warm and bright making it a lovely space to work and create in. 
I love the 1970s children prints that I picked up in a charity shop and keep my eyes peeled everywhere I go for some more, I'd like a gallery wall of 1970s prints on this wall.


Thursday, 24 April 2014

Easter Weekend Part Two

On the second day we got up early-ish and headed to a local car boot sale, I got an amazing bargain of a couple of 1970s pictures for £1! We all got a pretty good haul and came home exhausted but happy. We chilled out in the afternoon and went to a cute little local pub for a couple of cherry beers in the beer garden.


On the third day we took it slow, a lazy morning, followed by reading, crafting, painting, photography, coffee and a chocolate! Well it is Easter!
After lunch we blew off the cobwebs with a walk along the canal, and in the evening watched a lovely film in the local small Curzon cinema called 'The Lunchbox'. 
On the forth day, Monday, it was home time :( but not before a spot of lunch in a beautiful Scandinavian cafe in Harrogate called 'Baltzersen's'.

It was a perfect weekend full of all the favourite things we love to do, I'm now battling the blues since they have gone home but some of the 500 photos we took are keeping me going. until next time...

Wednesday, 23 April 2014

Easter Weekend

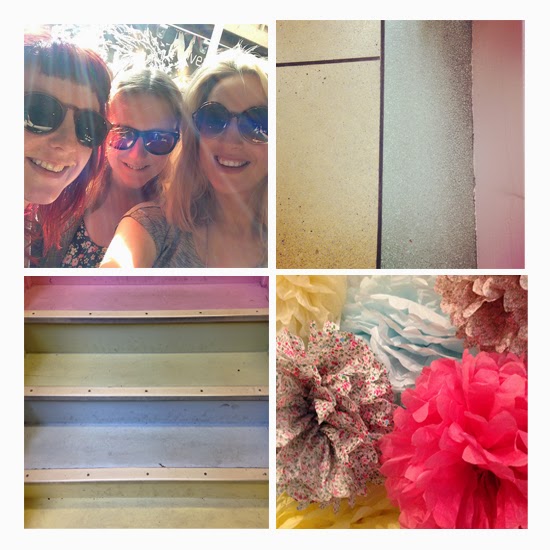
This Easter weekend I had friends up to visit. You know those friends that no matter how long you haven't seen them you just pick up where you left off. We were all at uni together five years ago and probably haven't all been together for nearly two years but it was as if we had never been apart.

Mostly the weekend consisted of eating nice food, drinking wine, face masks, shopping, crafting, walking and watching films, simple but perfect.


The first evening after picking them up from the station we had some prosecco to celebrate, followed by a homemade sweet potato, spinach and cauliflower dhal which is yummy, vegan and gluten free. We then pampered ourselves with not just face masks, but foot and hand masks too!
The first day we headed over to York for some lunch and shopping. We had lunch in a vegetarian cafe called 'Goji' check it out if your ever in York, lots of vegan options available, and we managed to get a lovely sun trapped spot in the courtyard. This fuelled us for some shopping before coffee in the park and lots of photo taking. 
Once home we whipped up some homemade falafel, sweetcorn and tomato salsa, salad and sweet potato fries with homemade mojitos.
This was just half the weekend! Part two coming up...

Sunday, 20 April 2014

Hatty's Home Tour: Master Bedroom

I love to be woken up in the morning by the sun streaming in the window, I'm not a particularly light sleeper so I don't need a dark room in order to get a good 40 winks. 

The main feature of the room is the amazing huge crochet blanket that covers the bed. One of my mums friends mother made it, just whipped it up in less than a week, you know, easy as that. 

Most of the furniture in this room started out pine and got the Annie Sloan chalk paint treatment. 

I have a few clothes (by that I mean lots) so a big wardrobe was important, I also always dreamed of having a proper dressing table that I could spend hours sitting at and preening. I don't have time to preen for hours but it is nice to be able to sit down and do my hair and make up in the morning. 

I also love the huge bed, it's so comfortable! I work hard, a good nights sleep is important to me! 


Monday, 14 April 2014

DIY: Homemade Honey Face-pack

 
This book on homemade cosmetics is our Mum's, we're not sure she's ever made anything from it but it has always fascinated us. Some things are way beyond where we would want to go - fancy making your own deodorant? No we didn't either! We did however fancy making our own face-packs, as this is a lovely treat and we often give each other 'facials'.
 
We looked in this book and online for ideas and had a scoot in the cupboards to see what we could find. We decided to go for oats, honey and yogurt - inexpensive and things most people have in already.
 
 
Jeanne Rose's book describes yogurt as 'The Fountain of Youth' due to the beneficial action of certain bacteria in milk. It does say you can use it directly as a moisturizer and it is good for sunburn. You can combine it with essential oils for a cleansing face mask.
 
Honey (according to the book) is, 'Food of the Gods' and is good for dressing all external skin problems and, again, acts as a moisturizer. (Err... please don't take any of this as medical advice!)
 
We used a hand food processor to whiz together 4 tablespoons of oats, 2 tablespoons of yogurt and 2 tablespoons of honey. It will, over half an hour, get much thicker - if it's too thick stir in a bit more yogurt, if you think it's too runny (like if it drips straight off your face) then add some more oats. We'd recommend using it pretty much straight away.
 
 
I left it on for about 15 minutes, my skin felt really smooth afterwards, however, I would  use it in the bath, as the 'take-off' was a bit messy!
 

Happy relaxing!
Emily x

Sunday, 13 April 2014

Polly Put The Kettle On...

Having my own vintage tea room is something I have dreamed about for 5 years before coming across an opportunity 18 months ago that enabled me to fulfil that dream. 

A local small department store that had been open since the 1950s closed due to the recession, the owner of the property put up a sign advising stalls for as little as £10 a day. He was inundated with small businesses signing up for a chance to trade on the high street. I heard about this through the local newspaper and approached the owner about opening up a vintage tea room within the store and he agreed! I few months later on October 31st 2012 I opened up for my first day and I have never looked back.

The first 6 months were pretty hard, I worked a lot, not really knowing the most time efficient way to do things, However I have learned a lot in the last 18 months and now run the cafe like a well oiled machine, which means I now get a little free time, allowing me to contribute to this blog! 

I will share some of my top secret cafe recipes here on this blog and some hints and tips into running your own business and a little insight into my cafe life. 

Here are a few snaps of my cute little vintage tea room: