Wednesday, 21 May 2014

Home Made Jam

makes 8-10 jars 

Can you guess the top seller in my vintage tea room?... Cream tea! I know! Shocking! So, I get through a lot of jam, I make my own jam because as far as I'm concerned home made is always better.

Making jam in theory is pretty simple, equal quantity of fruit and sugar and boil away until set, right? Well I've been making jam every couple of months for nearly two years and it never comes out the same. Here is the basic recipe I use and below are a few hint and tips I've picked up through experience.
2kg strawberries
2kg sugar
1 bottle pectin
1 lemon 

1. Removed the tops of the strawberries and chop in half
2. Put in a jam pan and heat for 5 mins
3. Add the pectin and lemon juice for another 10 mins 
4. Put a saucer in the freezer, after a few mins dribble some jam on it and pop back in the freezer for 5 mins, if the jam wrinkles it's ready. If not add the juice of another lemon and heat for another 5-10 mins, repeat adding half a lemon each time until the jam wrinkles when you push your finger through it on the saucer.
5. Thoroughly wash all the jars in hot soapy water and rinse, place on a baking tray and put in the oven for 30mins on 50 C to sterilise.
6. Scrape off any foam that may have settled to the top of the jam and carefully pour into the sterilised jars, and place wax discs over the top
7. Leave over night to cool. When cool tightly screw on the jar lids and decorate with fabric tops and pretty labels to your hearts desire


Hints and tips 

Once the jam is in the jars leave it a few mins then give it a quick stir I find the strawberries float to the top.

Jam can set more a week or two later, what starts out seeming like the perfect consistency can be really set later on. Simply add a bit of boiling water and give it a good stir in the jar, this will loosen it up a bit.

If your jam doesn't set at all but you've jarred it up, don't worry you won't need to throw it out but you will need to put it all back into the pan and reheat and add more lemon juice or pectin and sterilise jars again (You will loose a jar or so of jam).

If foam forms on the top, scrape as much of it off as you can.

Don't leave your jam unattended, that saying about a watched pot never boils, completely applies in this situation, as soon as you take your eyes off it boils over, and trust me, it's a pain to clean up!

When filling the jars, don't fill them right to the top straight away as you might find near the end you are left with jam that doesn't have any fruit in in, more like jelly, top up the jars with this and stir, this ensures a more even distribution of fruit.

Don't despair! I have jarred up unset jam, over set jam, burnt two massive pans of jam, boiled the jam over, you name it I've done it, but usually (bar the time I burnt it) I've managed to rectify it in some way and I'm still learning now. 

Experiment with different fruit and flavours, try different types with your mates then you can swap jars so you don't end up with ten jars of one type but lots of different types. 

Have fun and remember... Watch that pot! 


Tuesday, 20 May 2014

Millie Dress

I always talked about making Millie little dresses before she was born, then finally when she came along I never got around to doing it, until now.

Millie is 9 months but she is quite little but I would probably size this 9-12 months. 

I made the pattern from a little simple pinafore dress she wore when she was 3-6 months. I've tried to show the measurements below.


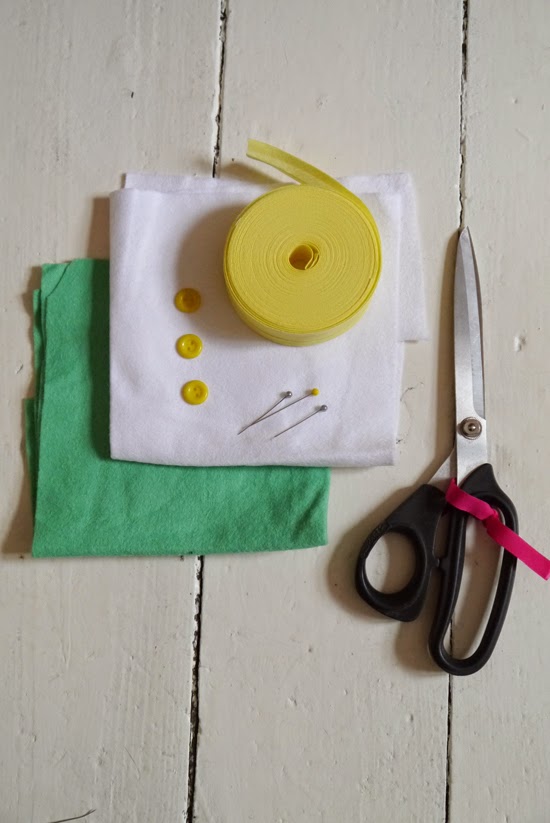
You will need:

1 x 1.5 meter fabric
Bias binding

A couple of felt squares
Three buttons
Pins
Thread 
Scissors
Measuring tape
Sewing machine 


The good thing about kids clothes is they can be pretty simple and still really cute. 
I'm not the best at sewing but these instructions take a basic sewing knowledge or a little intuition. and remember its a babies dress not a prom dress, have fun with it! 

1. Cut out the dress pieces. Cut the front piece on the fold and cut two for the back pieces
2. Sew the placket for the buttons back on its self twice on each side leaving enough so they over lap, and sew to hold in place, do a few rows of stitches at the bottom to secure it. 
3. Sew the side seams and shoulders seams together (right sides together)
4. Sew bias binding around the the arm holes
5. Sew up the hem
6. Turn the neckline in twice and sew around or bias bind it.
7. Cut out a couple of Peter Pan collar pieces in felt and sew to the neckline
8. Sew in a couple of button holes
9. Finally sew on a couple of buttons

And here it is being modelled by Millie...

Hatty x

Monday, 19 May 2014

Pretty Garden Shed

As I have admitted previously, I'm not remotely green fingered but I do love spending time in the garden, especially when the weather has been as glorious as it was this weekend. So this year I'm resolving to be better and look after my plants. To kick start the new me I gave my garden shed and gate a facelift... here's the before shots...

 
And after... I love it, I keep peeking out of the window at it and smiling to myself.


So next on the agenda are some simple plants for me to look after.
 
Emily x


Sunday, 18 May 2014

Avery Chanderlier

This quirky display started out as a Christmas decoration but when it came to taking down the decks I found myself not being able to part with these little guys. I do find myself forgetting it's there and that it's not a usual thing for people to have a big branch with artificial birds hanging above their dinning table and it makes for quite a talking point. 

Basically it's pretty simple and rather than show you step by step instructions I thought I'd just show the finished effect and let you figure out the logistics at the time. First you will need a big branch, we found one by the river bank near our house and left it to dry out for a few days. I've been collecting the birds for ages without anything specifically in mind for them but eBay is a good source for them. We used fishing line to hang the branch, it's perfect because it's strong and not very visible. We tied the line on in various places of the branch then used a staple gun to staple the line to the ceiling as this doesn't leave much of a mark (good for renters). You will probably need two to three people to hang the branch one to hold in place, one to staple and one to make sure it's in the right place. 

Voila! An indoor Aviary! 

Our branch did sag a little after it had been up for a couple of months but we just re-tied the fishing line up a bit and it's been fine ever since. 


Friday, 16 May 2014

Classic Chocolate Cake

225g Margarine
225g Sugar
4 eggs
1tsp baking powder
225g Self Raising flour
3tbsp Coco + 60ml boiling water

125g softened butter
250g icing sugar
3tbsp coco + 60ml boiling water

Whisk eggs and sugar until fluffy, add eggs and whisk, then self raising flour and baking powder, then add coco, give a good last whisk.
Divide between lined 8" round baking tins and bake 170 C for 30-minuets
To make the icing, whisk the softened butter and sift in the icing sugar gradually and finally whisk in the coco
Once the cake is cool spread half the icing on one of the cakes, place the other cake on top, make a swirly pattern with a fork and place chopped up flakes around the top to decorate. 

Simple and delicious! 


Bottle Vases

This is a super easy DIY. Basically collect a few mix match random bottles / jars. Ones with embossed patterns are the best. Yes, I'm one of those that will buy an expensive drink just because I like the bottle!
One of these is a coke bottle, one a pasta sauce jar and one a cider bottle. 
I used a white craft spray. This can be quite a messy job so probably best to do outside on a warm, dry, calm day. Shake the can really well first and spray in light, even stokes. Because the bottles are glass there was a little dripping but I didn't worry about this too much you cant tell once they are jazzed up with some flowers in. You might need to do a couple of coats to get an even coverage. Leave an hour or more between each coat.
They take a few days to completely dry so when they have been outside for an hour or so, bring them inside and leave to dry for a few days on some paper. 
I think these look great and are so simple. 
Hmm, what else can I spray?? I have a feeling a few more things might be getting the craft spray treatment! Hatty x

Thursday, 15 May 2014

Little Trip to Northumberland

Earlier this week Millie and I joined my mum for a night at Driftwood Retreat, a delightful holiday cottage owned by Shelly and Jim in Boulmer, Northumberland.

The cottage is beautifully finished and just a stone's throw from the sea. There were lots of lovely, welcoming touches, the most wonderful being the note to Millie from her new friend, Blue Bear.

 
Her reaction was to reach out for him, give him a kiss and then pass him to me for a kiss. It was such a wonderful gesture, thank you Shelly!
 
The cottage is perfect, with a double room and a children's bunk room and has everything you'd need for a lovely holiday. As well as all your home comforts there are also great touches including your basic kitchen cupboard essentials, candles, toys and games and WiFi. For more details on the cottage visit: http://www.northumbria-byways.com/viewitem.aspx?id=398 or search for 'Driftwood Retreat' on Facebook.


We had a walk around Alnmouth, a lovely nearby village right on the coast. Obviously I now want to live in a cottage by the sea so I may have done a bit of Rightmove scanning while we walked around!


We were really lucky with the weather, the sun shone fabulously all day. In the afternoon we took a walk around Howarth Gardens. I wish you could smell how amazing it was and really my photos do not do justice to the riots of colour in this place. I'm not a good gardener (this is a HUGE understatement) but visiting Howarth has really got me thinking about my own garden and some simple changes I could make to add some colour.  


 Emily x