Friday, 19 September 2014

DIY: Three tier cake stand

My very first business venture was selling vintage tea cups and saucers, homemade cake stands made with vintage plates and tea inspired jewelry on the quayside market in Newcastle. Every Sunday I would set up on the quayside for the low price of £6 and sell my wares. It wasn't going to make me a millionaire but it was more than the extra pennies I needed to supplement a waitress job and enabled me to save to go travelling. It also fueled a burning desire to be self employed and set the dream to one day have my own vintage tea room.
Polly put the kettle on 
a day in the life of polly 

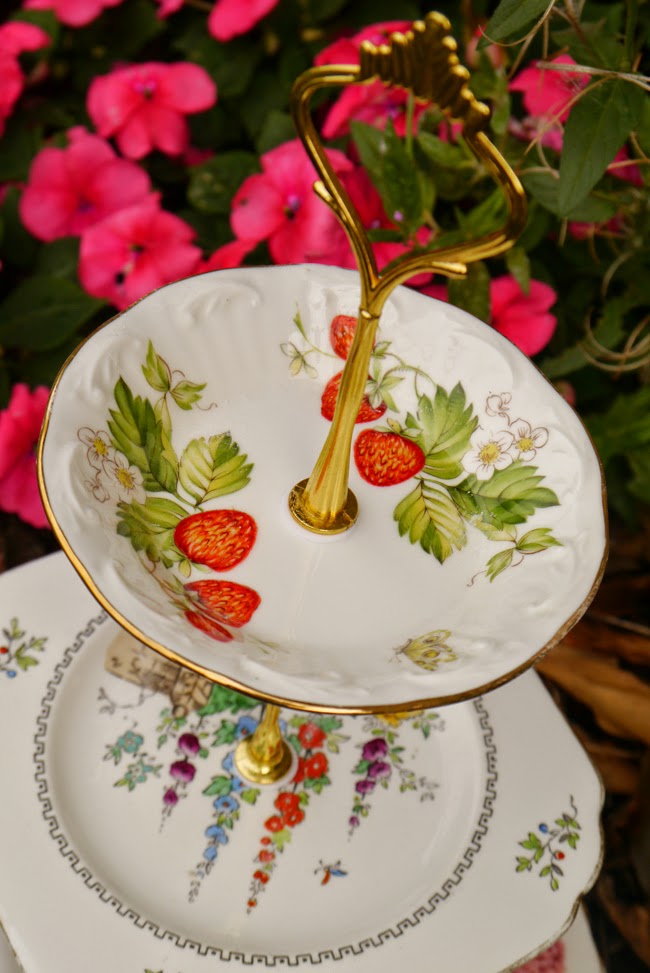
I don't focus as much on selling the cake stands, although a fair few go in the run up to Christmas, but I do use them to serve afternoon tea. I love peoples reactions when you present them their lunch on a beautiful, tiered, homemade, mix, matched, cake stand, it makes it that bit more special. 

You will need:

Ruler or set square
Marker pen
Drill with tile drill piece
Wooden bench or block to drill on
Tea towel
Bowl of water
3 x plates, in gradient sizes, mix matched
Set of three tiered rods - ebay is a good source 
1. Firstly, you will need to mark the center of the plate on the back. Use your ruler to find the middle and mark with the marker pen.
2. Next put the first plate face down on your wooden block and with the tip of the drill press down gently on the center spot, creating a little dent. 
3. Slash a little water on to the plate and pressing into the dent with the drill, gently start drilling, don't put too much pressure on the drill. 
4. Drill for 10 second intervals, in between, splash more water on the plate and place the tip of the drill piece into the bowl of water to cool it down. The  drill piece and the plate both get quite hot and this will cause the plate to crack so you need to keep cooling them down.

5. Eventually the drill will come out the other side of the plate, turn the plate over and drill on the other side until the hole gets bigger. Keep turning the plate back and forth until the hole is big enough to fit the cake stand rods through.
6. Give the plates a wash  and assemble your cake stand. 
7. Make sandwiches, scones and cakes and enjoy specialty afternoon tea with friends. 

Hatty x

Emily's Autumn Wish List

I love this season. I love it when the leaves turn and it gets a bit colder (admittedly I'm not great in the heat unless I'm just laid out with a book, the chances of which are pretty non-existent for a few years). I love wearing my boats and a coat and looking forward to a warm drink when you get in from a chilly autumn walk. I love the colour of autumn collections, as a red-head they are much more flattering than the brights of summer.
 
Clothes and accessories wish list:


1. A parka - I wanted one last year but couldn't find one I liked, hopefully this year I'll find this wardrobe staple
2. A chunky knit (or a few chunky knits) - something really snuggly. This one is from Zara
3. Some good quality dark blue skinny jeans. I'm quite small on top, with hips and a bum, so finding jeans and trousers to fit is a NIGHTMARE... if I get anywhere with this one, I'll let you know.
4. I love this mustard colour and this satchel is a bargain £16 from Sainsbury's
5. A chunky scarf... I hoping for crochet myself one!
6. My sister bought Millie some Dr Marten's for her birthday, ready for this autumn/winter - I really want a pair to match but can't decide between the exact same (cherry red) or the flowery ones.
7. A proper bobble hat - love it!
 
I am slowly but surely finishing our house (we moved in two years ago, I blame the baby that came along half way through). I therefore have an ever-changing interiors wish-list, this one is certainly influenced by autumn:
1. I'm currently updating our kitchen and I'm a huge Orla Kiely fan, so I think when I'm done I'll be needing a couple of Orla's tea towels to finish it off (available at John Lewis).
2. I've been admiring these lamps in a local interiors shop for ages but never really had anywhere for one... well I've found somewhere in our living room so it might just make an appearance.
3. An owl cushion for Millie's rocking chair - these were from Not on the High Street but I think I might try to make my own
4. Again... for the updated kitchen, salt and pepper mills
5. I'd like more plants in the house but I'm not great at keeping them alive, so thought I might go for some cacti (well out of little hand's reach).
 
Happy Autumn
Em x


Thursday, 18 September 2014

DIY Super Baby Costume

This was a mega quick DIY, mainly because it had to be as I realised on the morning of my friend's son's birthday party that it was fancy dress and superhero themed. I felt it was fine for Paul and I to turn up in our 'plain clothes' but that really Millie should be in costume. Granted when we got there, the term 'superhero' had been interpreted loosely being that there was a cow and a giraffe present, but still, I felt I needed to have made some effort.

So, with a quick root in the craft supplies I found (and you will need):
A baby vest (preferably colour matching your chosen superhero - I went with SUPER something)
Iron on printable transfer paper
Some felt
An iron and a sewing machine (preferable, not essential but speeds up the process and I literally made this half an hour before we left the house!)

 
Firstly find your superhero's logo (I don't advocate pinching images via Google but as this isn't to sell I don't think anyone will mind hugely). Reverse it (very important or it will be back to front as was my first mistake). You should be able to do this using any photo editing suite, I use Photoshop.
 
Print your logo. Again, normally I would say don't waste a whole sheet for just one little image but I had no time to think efficiently, if you do have the time fill the sheet with other images you might want to 'iron on transfer'.
 
Cut out your logo and place it onto the baby vest. Follow your instructions, but usually you iron on by pressing rather then gliding without using steam. Do this for a few minutes, until the image is well and truly melted into the fabric. Remove the backing.
 
I then 'set' the logo by using a plain piece of printer paper, place it over the top and iron again. This removes any excess plastic and makes the transfer quite soft and it should now be fine through the wash - check your instructions as they may have other ways to set the transfer.
 
Now for the cape! I had literally a scrap of red felt that I actually pinched from Hatty's material cupboard (another reason it is great she lives three doors down). I placed it on the back of the vest and roughly sketched the size and shape. Then cut it out using fabric scissors - this is where felt it great because it doesn't need hemming. Now just sew it onto the vest, a straight stitch across the top is all it needs - voila, one SUPER BABY outfit (I apologise that it wasn't ironed)!


N.b. You'll notice the logo isn't really bright, this is because the transfer paper I used is really for white or pale colours. You can buy transfer paper that is designed for dark colours and would give a more vibrant finish.
 
N.b. (again!) Don't forget that this isn't a normal baby vest anymore and wash it with all other clothes and then throw it in the tumble drier, your cape will become very very small! This is definitely NOT what I did... okay, I did, but it's still wearable and a little bit funny.
 
Enjoy your super babies
Em x


Sunday, 14 September 2014

Cauliflower Pizza Base

Lately I have been trying to watch what I eat and get a little healthier, not diet so much as just be a little more aware. 

I recently discovered cauliflower rice, and loved it. I'm not a big fan of rice and love to get as many vegetables into my diet as possible. So I have been experimenting with squash spaghetti, cauliflower rice etc. Then, by the powers of Pinterest, I discover cauliflower pizza base. When I get a pizza craving I usually opt for a tortilla pizza but this seemed like and even healthier option and like a great way to get another vegetable in for the day.
1. Cut the cauliflower off the stalk and chop into small pieces, place in a blender and blend until it resembles rice (this is basically your cauliflower rice). 
2. You can either microwave it for a few minutes or pop in the oven for about 10mins. You just want to cook the cauliflower slightly but you don't want it to go mushy. 
3. Get it out of the oven and lay the cauliflower rice on a tea towel and let it cool.
4. Once it's cool you need to squeeze out as much of the water was you poissibly can, it's an arm workout! 
5. Once you have squeezed out as much of the water as you can, put the cauliflower in a bowl with an egg and any flavourings you fancy. I added coriander, chilli flakes, salt and pepper and give a good mix.
6. place the cauliflower mix on some baking paper on a baking tray. Pat down the cauliflower and shape with your hands until it resembles a pizza base. 
7. Bake in the oven for 20 mins at 200 C or until golden brown and quite crispy on the edges, basically as long as you think you can get away with as this will dry it out and make it stick together better. 
8. Top with your favourite pizza toppings and pop back in the oven for 10mins. 
hatty x

Friday, 12 September 2014

Decade of Songs

Decade of songs 

Do you have one song that reminds you specifically of one year or one place in time. I was thinking about this one day, and I realised, for about a decade I can think of one song that takes me back to that year and that time in my life. This is a good way to make a playlist. 

This is my decade of songs: 

2004 -'Harder to breathe' - Maroon 5
(Sixth form, where I met one of my still best friends, I had a 1969 Hillman Imp as my first car and it didn't have a CD player, so I used to drive to Hannah's in my little vintage car with headphones attached to a portable CD player, playing Maroon 5, loudly) 

2005- 'Drive' - Incubus 
(After A levels, Hannah, two other friends and I drove to Newquay, it was my first proper holiday without parents and we played Incubus all the way! It's about an 8 hour drive!)

2006 - 'Stumble and Fall' - Razorlight 
(Art college, this was peak indie band time and I was into it big time. Studying an art foundation and living with Emily in Middlesbrough, my first year living away from home)

2007 - 'Mr. Brightside' - Killers 
(First year of uni)

2008 - 'Music is my hot hot sex' - CSS
(Second year of uni, and started placement. I met so many good friends at my placement at Heidi seeker, this was a pinnacle time in my life where I discovered who I am, and Laura introduced me to some ace new music!) 

2009 - 'Oxford comma' - vampire weekend 
(Placement and travelling in Australia)

2010 - 'Colours' - Calvin Harris 
(This was the perfect song to have my final collection walk down the catwalk to, summing up 4 years of university) 

2011 - 'Mary Jane' - Rick James
(Working as a chalet host in France, and the year the year Mike and I got to together, he used to always play this and it will always remind me of him)

2012 - 'Song with a Mission' - The Sounds
(Ski season and travelling New Zealand, a Finnish couple we met out there introduced me to The Sounds and I snowboarded the whole season to them!) 

2013 - 'Wildest Moments' - Jesse Ware 
(Mike came home from work one evening and put this song on that he had just heard on the radio and we cooked tea whilst listening to it, its a really insignificant thing to do but this song will remind me of the simple and happy life I have right now) 

2014 - ???? I'm completely struggling with a song for this year, but I guess the years not over yet... 

Tuesday, 9 September 2014

Craft Club: Meeting No:2 Dream Catchers

Our second craft club meeting took place on Tuesday, and although numbers still dwindle, we still always have a lovely time. I think this was the last we will be able to have in the park as the sun is setting earlier and earlier, but it was a beautiful evening and I'm glad we made the most of the nice weather.
So this months craft was dream catchers. The Ojibwe people have an ancient legend about the origin of the dreamcatcher. Storytellers speak of the Spider Woman, known as Asibikaashi; she took care of the children and the people on the land. Eventually, the Ojibwe Nation spread to the corners of North America and it became difficult for Asibikaashi to reach all the children. So the mothers and grandmothers would weave magical webs for the children, using willow hoops and sinew, or cordage made from plants. The dreamcatchers would filter out all bad dreams and only allow good thoughts to enter our mind. Once the sun rises, all bad dreams just disappear.
You will need:

A hoop
Wool, string, rope, cord, similar
Bit of lace, chains, buttons, etc to decorate
Wire
Scissors 
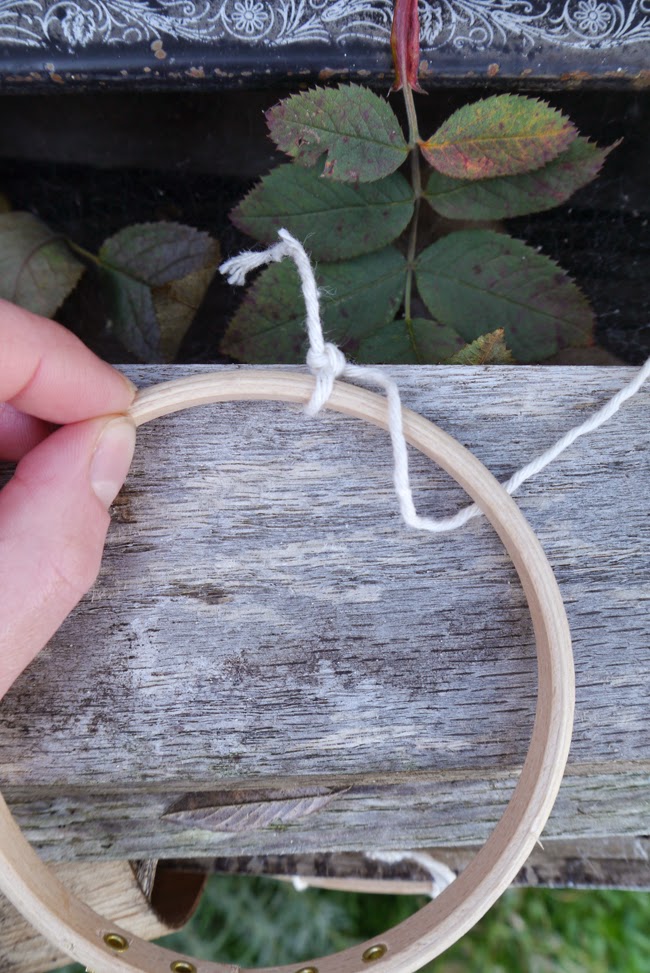
1. I used a embroidery hoop and string to form my dream catching web. I initially tied the string to the hoop and then made loops around the edge, knotting in between to hold in place. 
2. Once you have gone all the way around, move onto the inner circle by knotting in the middle of the outer hoops. 

3. Once you can't go around anymore tie is a double knot and cut off the excess. 
4. Hang all sorts of things from the bottom on the dream catcher. I used lace,, more string, fur cones, and twigs. 
5.I'm going for a rustic, neutral look and it tend to make a few more of various size and hang them off a big branch, inspired by the image below that I saw on Pinterest. via yoho yoho.
If you can make it come to the next craft club, keep an eye on the Facebook page to see when it is and what we will be crafting. We were thinking along the lines of something Halloween themed, get in touch on the blog or on the Facebook page if you have any ideas. 

Monday, 8 September 2014

Twix Shortbread

here is another great way to turn your favorite chocolate bars into something a little more fancy. See previous posts on mars bar crispies and kit kat brownies
Makes 18

450g plain flour
330g margarine
110g sugar
2 x 400g can condensed milk
100g white chocolate 
12 double twix
170g mixed nuts
200g milk chocolate

Pre heat oven to 170 C and grease and line a 13" x 9" baking tin.

Mix together flour and sugar, then rub in the margarine to form a dough. Press the dough into the tin and bake for 20mins until golden.

Meanwhile make the caramel by piercing two holes in the top of each tin, place them in a pan of boiling water, the water coming up to an inch below the top of the tins. Boil them for 4 hours. 

Melt the white chocolate and stir into the caramel, then chop the twix's into 1 inch chunks and roughly chop the nuts, and stir them into the caramel. Spread the mix over the shortbread.

Gently melt the milk chocolate over a pan of boiling water and then using a dessert spoon wiggle and flick the melted chocolate over the caramel twix mix and pop in the fridge to set. 
hatty x