Monday, 6 October 2014

Picnic Loaf

Until this rather wet a dreary day we have been enjoying a rather mild autumn so a couple of weeks ago Mike and I went out for an autumnal picnic on our bikes. Perhaps this was our last picnic for a while but I'm also a fan of a cozy mid season picnic. To take with us I made a picnic loaf.
This is a great alternative to sandwiches. It's really easy, though does require a little foreword planning as it is best prepared the night before.

1.Basically get a round cob of bread. I chose a whole meal. 
2.Cut the lid off, and scoop out the bread for the middle (blend into breadcrumbs and freeze for another recipe).
3. Brush the inside of the loaf with olive oil, then start layering up your filling. 
I chose chorizo, rocket, tomatoes, feta and olives. Keep packing it I until you can't get anymore in. 
4. Pop the lid back on and wrap in lots of cling film.
5. Place in the fridge with a heavy book on top and leave over night.

Don't forget to take a bread knife and chopping board with you on your picnic to cut    your into slices. 

Seriously this is one of the best picnic inventions, EVER!


Thursday, 2 October 2014

Homemade Baby Balm


Recently Millie developed a rash on her face and I wanted to make something nice and natural, so I roped in my friend Robyn to come and help me make a baby balm.  
 
We did a bit of research and www.wellnessmama.com gave us some good ideas. I was keen to use chamomile for it's soothing properties and Robyn wanted to use olive oil. We also didn't want a barrier cream (which has zinc oxide in) and a lot of recipes were for this.
 
Eventually we settled on this recipe which was a bit of a mixture of ones we'd found. We got our ingredients from a local health food shop and from Amazon.
 
Beeswax is antibacterial, anti-inflammatory and locks in moisture.
Coconut oil is pretty amazing and I could probably do a blog post just on this but essentially it is packed with good fatty-acids and proteins which can help repair skin, moisturise (although I've found on its own it can actually be quite drying) and protect the skin.
Cocoa Butter is a deep hydrator
Shea Butter again is a good moisturizer and can help heal skin
Olive oil acts as a anti-inflammatory, contains anti-oxidants and those great fatty-acids which fight naughty free radicals
Lavender oil inhibits bacteria and therefore can help protect against infection and its scent is calming
Chamomile oil is antiseptic, antibiotic, disinfectant, bactericidal and anti-allergenic
Vitamin E oil promotes healing
 
This is a tiny overview of the ingredients we used, I could go on and on and on, but I won't, you can do as much research into them as you like.
 
The process was easy:
1) Weigh your ingredients out. We used digital scales that you can reset and put everything in one bowl. The less bowls and spoons you can use the better as its all oily and a bit hard to wash.
2) Melt the ingredients over a pan of water (make sure the water isn't touching the bowl).
3) Once its all melted, leave to cool for a few minutes then blitz with a hand blender (preferably an old or spare one and keep it just for this kind of thing) this will stop it curdling. Put on an apron and put the bowl in the sink as you want to limit the cleaning! It'll look like this:
5) Allow to cool then decant into your jars/containers. Robyn had a great idea for this - spoon it all into a freezer bag, cut off the corner and pipe it into your containers as though it were icing.
 
I've used this on Millie's rash which looks a bit like eczema and its clearing up. I'm using it as a nappy cream and all the ingredients are safe for using with cloth nappies. It also makes a nice hand cream for you.
 
 
Nb. We doubled the amounts so there was enough for the two of us!
 
Em x
 

Sunday, 28 September 2014

Pastel Hair

About six months ago I became a touch obsessed with pastel colors, and inspired by pinterest particularly pastel hair! I dreamed of having pink or lilac hair for ages. Unfortunately my current hair was bright red dyed hair and the first consultation with a hair dresser pretty much said it was a no go! so I dreamed some more. 
Randomly, after another few months of deliberating, I asked in another hair dressers. They took samples of my hair and experimented with stripping out the red, and it worked without leaving my hair in a total wreak. 
 So finally on the 11th July my pink hair dream came true! And I love it! 
I touch my color up in between trips to the hairdressers with la riche directions semi permanent hair dyes, these are really good for temporary dyes. They have millions of crazy colors and generally wash out in a few washes. They really only work on blond hair and if you have dark hair and are thinking of going blonde I seriously recommend going to a professional, this is not one to be attempted at home!

So far Ive only attempted pastel pinks, lilac and lavender colors but I'm seriously tempted with a pastel blue or turquoise for a few weeks. I love the versatility of getting to try out a new hair color every few weeks without damaging my hair. 

Hatty x

Friday, 26 September 2014

Instagram Magnets

I love Instagram, and I'm trying to make sure I print out more Instragram photos, see my Instagram album. My fridge is also looking particularly bare, so I thought I'd combined the two for this little project.
This is a great way to make some personal magnets for yourself or for friends. I know its a while off yet but they would make great stocking fillers for Christmas or good Christmas cracker fillers.

You will need:

Printer
Pack printable shrinkles paper
Scissors
Tin foil
Oven
Magnets
Glue Gun and glue sticks
1. Re size your photos to be about 3 times the size you want the finished magnet to be, I only fit two photos on one A4 page. (it does recommend not printing images bigger than A6, most of mine were fine but one did get stuck to itself in the oven so be warned)
2. Also lighten the photo, I used Photoshop but all photo editing software will have a way of doing this. Lighten the photos lots as they get much darker when they shirnk. Also set your printer settings to photo enhance.
3. Print your pages one at a time and leave them to dry for 10 mins. 
4. Cut out the photos and place one at a time on a baking sheet covered in foil. 
5. Put the photo in the oven, it only takes a minute to curl up, shrink then lay flat.
6. Take the photo out of the oven and place it under a flat heavy book, and start again with the next photo from instruction 4.

8. Using a glue gun, glue a magnet to the back of the photo and voila! 
9. Magnet to your fridge. 


Hatty


Friday, 19 September 2014

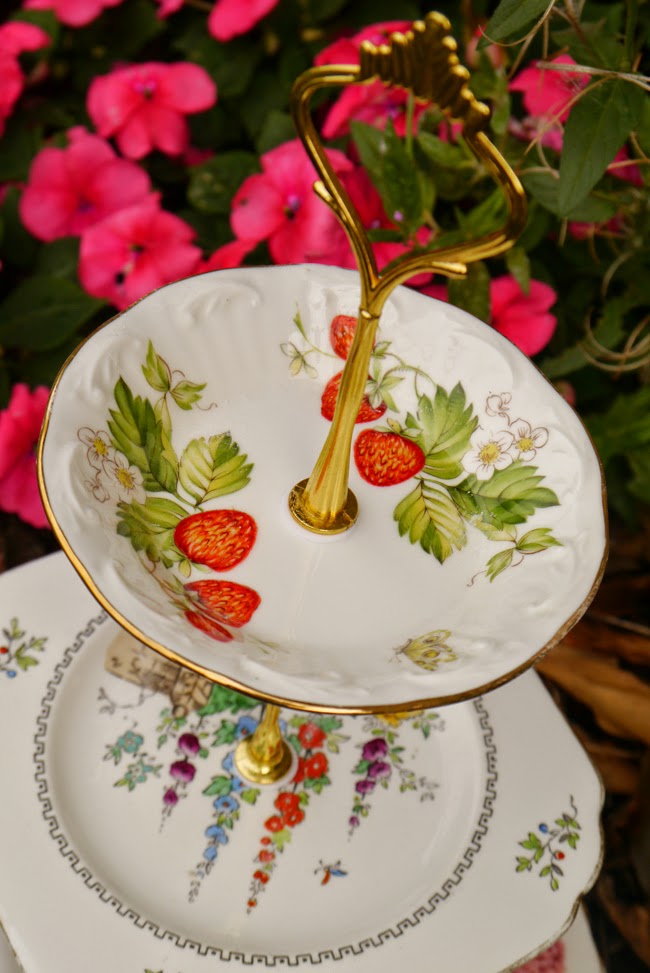
DIY: Three tier cake stand

My very first business venture was selling vintage tea cups and saucers, homemade cake stands made with vintage plates and tea inspired jewelry on the quayside market in Newcastle. Every Sunday I would set up on the quayside for the low price of £6 and sell my wares. It wasn't going to make me a millionaire but it was more than the extra pennies I needed to supplement a waitress job and enabled me to save to go travelling. It also fueled a burning desire to be self employed and set the dream to one day have my own vintage tea room.
Polly put the kettle on 
a day in the life of polly 

I don't focus as much on selling the cake stands, although a fair few go in the run up to Christmas, but I do use them to serve afternoon tea. I love peoples reactions when you present them their lunch on a beautiful, tiered, homemade, mix, matched, cake stand, it makes it that bit more special. 

You will need:

Ruler or set square
Marker pen
Drill with tile drill piece
Wooden bench or block to drill on
Tea towel
Bowl of water
3 x plates, in gradient sizes, mix matched
Set of three tiered rods - ebay is a good source 
1. Firstly, you will need to mark the center of the plate on the back. Use your ruler to find the middle and mark with the marker pen.
2. Next put the first plate face down on your wooden block and with the tip of the drill press down gently on the center spot, creating a little dent. 
3. Slash a little water on to the plate and pressing into the dent with the drill, gently start drilling, don't put too much pressure on the drill. 
4. Drill for 10 second intervals, in between, splash more water on the plate and place the tip of the drill piece into the bowl of water to cool it down. The  drill piece and the plate both get quite hot and this will cause the plate to crack so you need to keep cooling them down.

5. Eventually the drill will come out the other side of the plate, turn the plate over and drill on the other side until the hole gets bigger. Keep turning the plate back and forth until the hole is big enough to fit the cake stand rods through.
6. Give the plates a wash  and assemble your cake stand. 
7. Make sandwiches, scones and cakes and enjoy specialty afternoon tea with friends. 

Hatty x

Emily's Autumn Wish List

I love this season. I love it when the leaves turn and it gets a bit colder (admittedly I'm not great in the heat unless I'm just laid out with a book, the chances of which are pretty non-existent for a few years). I love wearing my boats and a coat and looking forward to a warm drink when you get in from a chilly autumn walk. I love the colour of autumn collections, as a red-head they are much more flattering than the brights of summer.
 
Clothes and accessories wish list:


1. A parka - I wanted one last year but couldn't find one I liked, hopefully this year I'll find this wardrobe staple
2. A chunky knit (or a few chunky knits) - something really snuggly. This one is from Zara
3. Some good quality dark blue skinny jeans. I'm quite small on top, with hips and a bum, so finding jeans and trousers to fit is a NIGHTMARE... if I get anywhere with this one, I'll let you know.
4. I love this mustard colour and this satchel is a bargain £16 from Sainsbury's
5. A chunky scarf... I hoping for crochet myself one!
6. My sister bought Millie some Dr Marten's for her birthday, ready for this autumn/winter - I really want a pair to match but can't decide between the exact same (cherry red) or the flowery ones.
7. A proper bobble hat - love it!
 
I am slowly but surely finishing our house (we moved in two years ago, I blame the baby that came along half way through). I therefore have an ever-changing interiors wish-list, this one is certainly influenced by autumn:
1. I'm currently updating our kitchen and I'm a huge Orla Kiely fan, so I think when I'm done I'll be needing a couple of Orla's tea towels to finish it off (available at John Lewis).
2. I've been admiring these lamps in a local interiors shop for ages but never really had anywhere for one... well I've found somewhere in our living room so it might just make an appearance.
3. An owl cushion for Millie's rocking chair - these were from Not on the High Street but I think I might try to make my own
4. Again... for the updated kitchen, salt and pepper mills
5. I'd like more plants in the house but I'm not great at keeping them alive, so thought I might go for some cacti (well out of little hand's reach).
 
Happy Autumn
Em x


Thursday, 18 September 2014

DIY Super Baby Costume

This was a mega quick DIY, mainly because it had to be as I realised on the morning of my friend's son's birthday party that it was fancy dress and superhero themed. I felt it was fine for Paul and I to turn up in our 'plain clothes' but that really Millie should be in costume. Granted when we got there, the term 'superhero' had been interpreted loosely being that there was a cow and a giraffe present, but still, I felt I needed to have made some effort.

So, with a quick root in the craft supplies I found (and you will need):
A baby vest (preferably colour matching your chosen superhero - I went with SUPER something)
Iron on printable transfer paper
Some felt
An iron and a sewing machine (preferable, not essential but speeds up the process and I literally made this half an hour before we left the house!)

 
Firstly find your superhero's logo (I don't advocate pinching images via Google but as this isn't to sell I don't think anyone will mind hugely). Reverse it (very important or it will be back to front as was my first mistake). You should be able to do this using any photo editing suite, I use Photoshop.
 
Print your logo. Again, normally I would say don't waste a whole sheet for just one little image but I had no time to think efficiently, if you do have the time fill the sheet with other images you might want to 'iron on transfer'.
 
Cut out your logo and place it onto the baby vest. Follow your instructions, but usually you iron on by pressing rather then gliding without using steam. Do this for a few minutes, until the image is well and truly melted into the fabric. Remove the backing.
 
I then 'set' the logo by using a plain piece of printer paper, place it over the top and iron again. This removes any excess plastic and makes the transfer quite soft and it should now be fine through the wash - check your instructions as they may have other ways to set the transfer.
 
Now for the cape! I had literally a scrap of red felt that I actually pinched from Hatty's material cupboard (another reason it is great she lives three doors down). I placed it on the back of the vest and roughly sketched the size and shape. Then cut it out using fabric scissors - this is where felt it great because it doesn't need hemming. Now just sew it onto the vest, a straight stitch across the top is all it needs - voila, one SUPER BABY outfit (I apologise that it wasn't ironed)!


N.b. You'll notice the logo isn't really bright, this is because the transfer paper I used is really for white or pale colours. You can buy transfer paper that is designed for dark colours and would give a more vibrant finish.
 
N.b. (again!) Don't forget that this isn't a normal baby vest anymore and wash it with all other clothes and then throw it in the tumble drier, your cape will become very very small! This is definitely NOT what I did... okay, I did, but it's still wearable and a little bit funny.
 
Enjoy your super babies
Em x