Pages

Friday, 30 May 2014

Roasted Broccoli

This is just a quick one but it's so delicious I had to share it.

I'm a fan of broccoli but always just steam it which doesn't exactly fill it with taste, in fact I generally prefer it raw. Then Hatty suggest I roast it and it's amazing!

Simply chop the broccoli florets off the stem, as small or large as you like, put into an oven proof dish and drizzle with olive oil. You can simply leave it at that or sprinkle some paprika over (here I've done half and half). I think adding some chopped garlic would be delicious too, but I don't have any.


Put in the oven for about 45 minutes at 200 degrees or gas mark 6. I like it really crispy so you may want to check it before then.


This is a great side dish or to be honest I could just snack on it.


Emily x


Thursday, 29 May 2014

DIY: Painted Plant Pots

Gardening can be an expensive business so Hatty and I have been trying to find ways to do things a bit more cheaply. Cheap plant pots are fairly boring and ugly so we decided to jolly them up with a bit of spray paint. This is also a good way of tying a collection of pots together that you may have inherited or picked up from a charity shop or car boot.

Ours were just plastic tubs that started out a terracotta colour.


Spray the pots outside and use a large sheet to protect the floor (unless you want coloured grass). With spray painting its best to build up lots of thin layers (leave about 30mins in between each if its a warm dry day).

 
Hatty left her pots all one colour and has planted them up beautifully and surrounded her back door with them.
 
 
I turned my pots upside down and with a contrasting colour paint I sprayed heavily around the base and allowed it to dribble down. I've then planted herbs into them, I think perhaps I need a few more.
 
 
Emily x


Tuesday, 27 May 2014

Lemon and Raspberry Tart

Lemon and raspberry tart

This is a lovely light tart, perfect for the those long summer evenings when the weather calls for alfresco dining. 
300g shortcrust pastry
150g Sugar
4 eggs 
300ml double cream
2 lemons, zest and juice
200g raspberries 

Line a 10" flan tin with shortcrust pastry. Blind bake the pastry for 12 mins, remove the baking beans and bake pastry for a further 8mins.
Whisk the eggs and the sugar together, then whisk in the cream, lemon juice and lemon zest.
Pour the lemon mixture into the pastry case and drop in raspberries one at a time. 
Bake at 170 C for 25-30mins until golden and not too wobbly in the middle.


Monday, 26 May 2014

DIY: Blackboard Herb Pots

I've seen these on pinterest and have been meaning to get motivated with my fresh herbs and this was the inspiration I needed. I grow some more hardy herbs outside, rosemary, chives, thyme, parsley and mint but I find basil and coriander are best grown on a sunny window sill, and I have more mint, what can I say? I LOVE mojitos. 

This is a easy DIY, it literally took me about 15 mins start to finish.

You will need:
Terracotta pots, with a drainage hole
masking tape
chalkboard paint
paint brush
chalk or chalkboard pen
herbs

Simply masking tape around where you wish the paint to stop. Paint on the blackboard paint, this only needed one coat and was dry in 10 mins. Then simply label your selected herb pots with chalk and pop some herbs in them, place on a saucer, put them in a sunny spot and give them a good regular water.

Sunday, 25 May 2014

Millionaires Shortbread

I have no idea why this is called millionaires shortbread, it just is, perhaps it is particularly loved by millionaires??
400g Milk Chocolate
1 x 400g can condensed milk
225g plain flour
170g butter
55g sugar

Rub butter into flour and sugar to make a soft dough and push into rectangle tin 13" x 9", bake at 170 C for 20mins until golden.
Pierce two holes in the can of condensed milk with a tin opener, place in a pan of boiling water one inch from the top of the can and boil for 4 hours.
Spread condensed milk over base.
Melt chocolate and spread over caramel and leave to set.
 
Tip: if your condensed milk is still too sloppy when it has turned to caramel, try stirring 100g of melted white chocolate into it, the chocolate will help it set.
Hatty x

Saturday, 24 May 2014

Flapjack

I love flapjack, its really simple and you can add all sorts to mix it up a bit, try adding cranberries and nuts or fresh raspberries and chocolate chips to this classic recipe.

450g butter
300g brown sugar
8 tbsp golden syrup
700g oats

Melt butter and sugar, add to oats and golden syrup.
Bake in lined 13" x 9" rectangle tin at 170 C for 30 mins until golden


Friday, 23 May 2014

Emily's Summer Wishlist

Ok, a capsule wardrobe it isn't, but here are some lovely things I'm loving for this summer...


1. Tatty Devine necklace (part of the Rob Ryan collection that I love!)
3. Fat Face dress (I plan to spend the summer in Maxi dresses)
4. Disaster Designs bag (I like too many of the prints of these bags, how to choose?)

Emily x

Thursday, 22 May 2014

Almond Slices

Almond slices are another top seller in the cafe. They are basically a bakewell tart in slice form. They make a great little snack and delicious with a cup of vanilla tea. The best recipe for them is straight out of the trusty be-ro book, see below.

Wednesday, 21 May 2014

Home Made Jam

makes 8-10 jars 

Can you guess the top seller in my vintage tea room?... Cream tea! I know! Shocking! So, I get through a lot of jam, I make my own jam because as far as I'm concerned home made is always better.

Making jam in theory is pretty simple, equal quantity of fruit and sugar and boil away until set, right? Well I've been making jam every couple of months for nearly two years and it never comes out the same. Here is the basic recipe I use and below are a few hint and tips I've picked up through experience.
2kg strawberries
2kg sugar
1 bottle pectin
1 lemon 

1. Removed the tops of the strawberries and chop in half
2. Put in a jam pan and heat for 5 mins
3. Add the pectin and lemon juice for another 10 mins 
4. Put a saucer in the freezer, after a few mins dribble some jam on it and pop back in the freezer for 5 mins, if the jam wrinkles it's ready. If not add the juice of another lemon and heat for another 5-10 mins, repeat adding half a lemon each time until the jam wrinkles when you push your finger through it on the saucer.
5. Thoroughly wash all the jars in hot soapy water and rinse, place on a baking tray and put in the oven for 30mins on 50 C to sterilise.
6. Scrape off any foam that may have settled to the top of the jam and carefully pour into the sterilised jars, and place wax discs over the top
7. Leave over night to cool. When cool tightly screw on the jar lids and decorate with fabric tops and pretty labels to your hearts desire


Hints and tips 

Once the jam is in the jars leave it a few mins then give it a quick stir I find the strawberries float to the top.

Jam can set more a week or two later, what starts out seeming like the perfect consistency can be really set later on. Simply add a bit of boiling water and give it a good stir in the jar, this will loosen it up a bit.

If your jam doesn't set at all but you've jarred it up, don't worry you won't need to throw it out but you will need to put it all back into the pan and reheat and add more lemon juice or pectin and sterilise jars again (You will loose a jar or so of jam).

If foam forms on the top, scrape as much of it off as you can.

Don't leave your jam unattended, that saying about a watched pot never boils, completely applies in this situation, as soon as you take your eyes off it boils over, and trust me, it's a pain to clean up!

When filling the jars, don't fill them right to the top straight away as you might find near the end you are left with jam that doesn't have any fruit in in, more like jelly, top up the jars with this and stir, this ensures a more even distribution of fruit.

Don't despair! I have jarred up unset jam, over set jam, burnt two massive pans of jam, boiled the jam over, you name it I've done it, but usually (bar the time I burnt it) I've managed to rectify it in some way and I'm still learning now. 

Experiment with different fruit and flavours, try different types with your mates then you can swap jars so you don't end up with ten jars of one type but lots of different types. 

Have fun and remember... Watch that pot! 


Tuesday, 20 May 2014

Millie Dress

I always talked about making Millie little dresses before she was born, then finally when she came along I never got around to doing it, until now.

Millie is 9 months but she is quite little but I would probably size this 9-12 months. 

I made the pattern from a little simple pinafore dress she wore when she was 3-6 months. I've tried to show the measurements below.


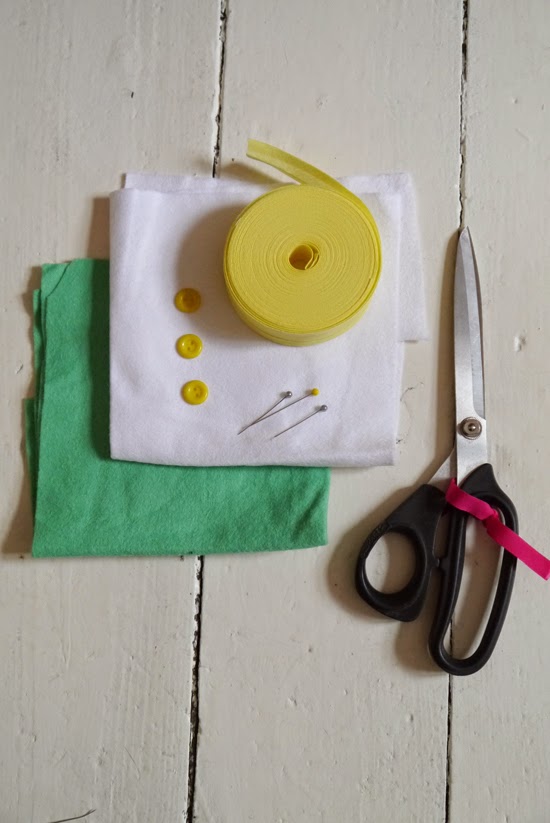
You will need:

1 x 1.5 meter fabric
Bias binding

A couple of felt squares
Three buttons
Pins
Thread 
Scissors
Measuring tape
Sewing machine 


The good thing about kids clothes is they can be pretty simple and still really cute. 
I'm not the best at sewing but these instructions take a basic sewing knowledge or a little intuition. and remember its a babies dress not a prom dress, have fun with it! 

1. Cut out the dress pieces. Cut the front piece on the fold and cut two for the back pieces
2. Sew the placket for the buttons back on its self twice on each side leaving enough so they over lap, and sew to hold in place, do a few rows of stitches at the bottom to secure it. 
3. Sew the side seams and shoulders seams together (right sides together)
4. Sew bias binding around the the arm holes
5. Sew up the hem
6. Turn the neckline in twice and sew around or bias bind it.
7. Cut out a couple of Peter Pan collar pieces in felt and sew to the neckline
8. Sew in a couple of button holes
9. Finally sew on a couple of buttons

And here it is being modelled by Millie...

Hatty x

Monday, 19 May 2014

Pretty Garden Shed

As I have admitted previously, I'm not remotely green fingered but I do love spending time in the garden, especially when the weather has been as glorious as it was this weekend. So this year I'm resolving to be better and look after my plants. To kick start the new me I gave my garden shed and gate a facelift... here's the before shots...

 
And after... I love it, I keep peeking out of the window at it and smiling to myself.


So next on the agenda are some simple plants for me to look after.
 
Emily x